Showing posts with label Windows and Other OS. Show all posts

Thursday, April 24, 2014

How To Control Android Phone From PC

Hello Android Users, Welcome to TechAccessory. Are you one of them, who spend whole day with computer? If your Answer is yes, Then this post is only for you. What if you can use your mobile via your computer? This will be very good for you because you can send SMSs, make calls with your PC.

Do you know how to control android phone from pc? I am here to tell you. Have a look:

What you will need?
  1. Android device
  2. A computer
  3. Playstore Account
  4. Wifi connection
  5. Web browser

How To Control Android Phone From PC?

Follow my step by step instructions:
  • First, Make all required things ready
  • Unlock your Android Phone.
  • Turn on Wifi
  • Go to Playstore and Search AirDroid
  • Install AirDroid
  • Open Airdroid on your phone
  • Sign up an acoount
  • Turn on your computer
  • Open your browser
  • Go to web.airdroid.com
  • Login your account
  • A pop up confirmation will appear on your phone's screen
  • Accept that.
  • Now, control your Android phone from your web browsers
What you can control with AirDroid:
  • Send, read and type SMS
  • Make any call
  • Reject any incoming calls
  • Manage your apps
  • Manage your contacts
  • Manage ringtones
  • Manage files
  • Use phone camera as webcam
  • Take screenshot
  • and much more
That'll all. Just follow my Step by Step instructions To Control Android Phone From PC.

How To Control Your Computer From Your Android Phone

Hello TechLovers, Welcome to TechAccessory. I am very excited, because now I am going to share you an amazing post. It's about android and it's about connecting your PC.

What kind of OS are you Using? Mac or a Windows? Anything you use, This post is for everyone. It's all about How to Control your computer From your Android Phone.

Now a days everyone has Smartphone. Smartphone must be smart. Smartphones like iPhone and Android Phone are too smart because they can control your computer completely. Wanna know how? Follow my Step-by-Step instructions:

How To Control Your Computer From Your Android Phone:

Things needed:
  1. Wifi Connections
  2. Computer (Mac/ Windows vista, 7,8)
  3. Android device
  4. Playstore Account

Now I am starting the operation: 

  • Make All this thing ready which are needed
  • First, Take your Android Phone
  • Connect your Android with WiFi
  • Go to PlayStore
  • Install Remote Mouse
  • Open the app
  • Now Turn on your computer
  • Open any of your web browsers and Go to www,remotemouse.net
  • Download Remote Mouse Program for your Computer
  • As download Completes, Install the program
  • Run the Program
  • Now Change your setting from Android device
  • Then you Tap START
  • Now you can control your Computer with your Android. It works like a virtual Touchpad
How you operate:
  1. Single Tap = Left click
  2. Double tab = Right Click
  3. Two Finger Swipe Up/down = Scroll Screen Up/down
  4. Two Finger Swipe Right/left = Scroll Screen Right/left
  5. Swipe with single finger = Move your cursor
It's very easy. Try it right now because it's fun to Control Your Computer From Your Android Phone. Thank you for your valuable time.

Wednesday, April 23, 2014

How To Setup Dual Monitors on Windows 7 and on Mac

Hello everyone, Welcome to TechAccessory, Do you know it's possible to use 2 monitors for your PC? It could be an extra monitor with a laptop or extra monitor with a desktop or extra monitor with a Mac.

If you feel you have to use 2  monitors for your work, I am here to tell you how to setup dual monitor. It's an easy process. Now, I am going to show the whole process. Windows and Mac both users are welcome. First, I will give you instructions for windows 7 user:

How To Setup Dual Monitors on Windows 7: 

  1. Make sure your computer has an extra port for any additional monitor
  2. Connect the second monitor with your computer anyway, usually via VGA port
  3. If your computer doesn't have any extra port, you will need a new graphics card
  4. As the new monitor connected, you will find an option menu
  5. Here, you'll have to choose whether you want to mirror or Extend your desktop
  6. You can change the setting manually
  7. For manual Setting you have to Right Click On Desktop and then select Personalize
  8. Select Display Setting
  9. Here you can change any display setting. You can turn off 2nd monitor or make 2nd monitor as the main display or something else
  10. Now your 2nd monitor is ready to use

How To Setup Dual Monitors on Mac OS X: 

  1. Get ready to connect a 2nd monitor, Mac has the port for 2nd monitor
  2. Connect your 2nd monitor with VGA, DVI, Thumderbolt cable etc.
  3. As the display plugged in, you will have to choose between Mirror/ extending your desktop
  4. If you don't find the option, open System preferences
  5. Select Display
  6. Click on Detect Display
  7. Now you can change settings manually.
  8. Finally, your Mac is connected to a 2nd monitor
Thank you for your time. If you face any problem while setting up Dual monitor , let me know.

How To Connect PS3 Controller To PC

Hello Gamers, Welcome to TechAccessory. Do you feel comfortable playing games with mouse and keyboard? I think you love to play with PS3 Controller. Do you know how to connect PS3 controller to your PC?
How To Connect PS3 Controller To PC

It's not just plugging in, you have to do some more work. You will need to install drivers and configure that. Now I am going to tell you the whole process. All you need to do is follow my step by step instruction.

How To Connect PS3 Controller To PC?

  • Open your browser
  • First, you have to download MotionInJoy. Click here For the download link
  • Download the Software with the latest version and considering your current version of windows (such as windows 7 32 bit, windows  64 bit etc.)
  • Install the program successfully
  • Before you hit the finish button mark Run DS3 tool on the final screen of the installation process 
    How To Connect PS3 Controller To PC
  • Connect your Controller with your PC
  • Open your MotionInJoy program
  • Click Driver Manager
  • Then the program will recognize the PS3 controller
  • Place a checkmark to USB port
  • Click on Load Driver
  • Select Install this driver anyway
  • Wait till the process completes
  • Now, Click on profiles tab
  • Select PlayStaion 3 and click Enable button
  • The configuration process is completed 
    How To Connect PS3 Controller To PC
  • Now click on Vibration Testing
  • It will vibrate to make sure your PS3 Controller is Successfully connected.
That's all. It's very easy, anyone can do this. If you face any problem while doing this, please contact us or comment here.

Monday, April 21, 2014

How To Recover Deleted Files After Emptying Recycle Bin on Windows 7

Dear visitor, Welcome to TechAccessory. Deleting is not enough to vanish one file. One can easily restore deleted files from Recycle bin. What if you Empty your Recycle bin? Is the files vanished forever? Is there any way to get the files deleted from recycle bin? If you have these questions in your mind, Listen to me very very carefully. I am going to tell you the way for recovering that deleted file. It's not so easy or not so tough. All you need to do is follow my instructions.

How To Recover Deleted Files on Windows 7 After Emptying Recycle Bin? 

I will show you two different ways to do that. Read both and choose the one you prefer most. Have a look:

How To Recover Deleted Files Windows on 7 After Emptying Recycle Bin From Control Panel:

  • First Go to start menu
  • Select Control Panel
  • Find Performance and Maintenance and select that
  • Click on backup your data
  • Click next
  • Choose Restore Files and setting,
  • Click on next again
  • Now select your folder locations when Items to restore list appears
  • Click on finish. Then the system will do everything. If there is no big error/ damage you will find your file as the process completes

How To Recover Deleted Files Windows on 7 After Emptying Recycle Bin Using a program:

  • Don't make any change in the folder
  • Now, Find a File Restoration program
  • Buy the selected File Restoration program from the store or download from the internet
  • Some programs may cost money
  • Install the program on your computer
  • Then, follow their instructions.
  • You will get instructions step by step while doing the operation.
Hope you find what you were looking for.

Wednesday, April 16, 2014

How To Convert avi to mp4 On Mac For Free Without Loosing Quality

Welcome to TechAccessory. Mp4 is the most popular and highly used video format. As everyone has Smartphones and Tab these days, the importance of keeping mp4 media files rises. Everyone watches videos and movies on Smartphone and  tabs. Mp4 is the best format for this type of devices. What if you have avi media file and you want them in your iPhone or iPad?
Now, I am going to tell what you should do. The best way is converting those avi files to mp4. Are you thinking about the quality? Don't worry. I am going to share the way to convert avi to mp4 on mac for free without loosing quality. Here we go:

How To Convert avi to mp4 On Mac For Free Without Loosing Quality:

Things required:
  1. A Mac computer
  2. Video Converter
  3. AVI files

Convert avi to mp4 On Mac with iSkysoft: 

  • Get your iSkysoft
  • Run the program
  • Now, click on add files
  • Set mp4 as your output media file
  • Now, click to convert
  • Then, convert process will start
  • Wait till it completes
  • Finally, you find your desired mp4 videos

Convert avi to mp4 On Mac with Tune4Mac video converter:

  • Download your Tune4Mac video converter
  • Install that on your Mac
  • Run The program
  • Now Click add file
  • Select the files you need to convert
  • Now, select mpeg4 as your output media formats
  • Click convert button to start
  • Then, Tune4mac will start converting
  • As the process completes, you get your file in MP4 format

Convert avi to mp4 On Mac online:

  • Go to any avi to mp4 converter site
  • Upload your media files
  • Then click convert/start etc
  • As the process completes, you will find the Download button
  • Download that
  • This downloaded file is your desired mp4 file
I hope I told you the best ways to convert avi to mp4. Try anyone. It's really easy. Thank you.

    How To Convert JPG To PDF On Mac

    Welcome to TechAccessory. Are you a Mac user? Are looking for something which will help you to convert your single or multiple image files to a pdf file? If your answer is yes, I am here to help you. It's easy, but, little tricky process. Now, let me tell you the way of converting JPG to PDF:


    How To Convert JPG To PDF On Mac:

    • Open Automator
    • Select Workflow
    • Select your files from the left column, then Drag to Right hand column
    • Go to search field
    • Type preview
    • Find New PDF image
    • Drag that to the right column
    • Then, Click on the Add button
    • Now type a output file name
    • Click run
    • Wait until the process completes
    • That's all
    You can also try online JPG to PDF converter sites:
    All you need to do is follow my instructions, It's easy and I will not kill a huge time. Thank you for reading my article. 

    Sunday, April 13, 2014

    How To Setup Windows 7

    Hello, Everyone! Welcome to TechAccessory. Now, I am going to tell you how to setup windows 7. Everyone knows that Windows is the most popular OS and among the different version of Windows, Windows 7 is more popular that others. Now, the question is How to setup windows. Have a look:

    1. Prepare your computer for installation:

    Computer's requirements:

    • At least 16GB free hard disk spaces (for 32 bit, 20 GB for 64bit)
    • Minimum 1GHz processor
    • At least 1GB RAM (for 32 bit, 64 bit needs 2GB RAM)
    • Working DVD drive

    Prepare for installation:

    • First turn on your computer
    • Insert the Windows 7 installler disk
    • Check the disk
    • Restart your computer

    2. Installing Windows 7:

    • As the computer starts, press F2 or Del button
    • Bios menu will appear
    • Now go to the Boot menu
    • Choose to boot from CD/DVD
    • Press F10 to save all changes
    • Then Computer will load files from CD
    • Choose the language, Time format and input method
    • Click Next
    • Choose between x86 (32 bit) and x64 (64bit), click next
    • Now click "I agree with.....", click next
    • Choose the type of Windows installation,choose Custom
    • Now select the drive, where you want to install windows
    • You can also format the drive from Drive options
    • Click next
    • Now windows installer will run it's own process. Your computer will restart several times. Let windows installer complete all process.
    • As installation finishes, a menu will appear
    • Input your name, click next
    • Input your password, Next
    • Type your product key and click next
    • Then click Use Recommended Setting, click next
    • Set time zone, Next
    • Then choose Home network
    • That's all
    It's easy. You can try that. I hope you clearly understand my instructions. Thank you.

    Monday, April 7, 2014

    How To boot Windows 7 and Windows 8 From USB?

    Welcome to TechAccessory. Do you know it's possible to setup windows with a USB Pendrive? It's a simple and easy process. The best thing is installing windows with  USB is faster than Installing from DVD. It doesn't matter you use windows 7 or windows 8. Now, I am going to tell you How To boot Windows 7 and Windows 8 From USB?


    Step 1: Boot your USB

    • Download and install PowerISO
    • Insert your USB device
    • Go to the tools menu and select Create Bootable USB drive
    • Click Continue
    • Press "..." button and open Windows 7 or Windows 8 ISO file
    • Select USB drive as Destination USB Drive
    • Click Start to create Win 7/8 USB drive

    Step 2: Configure the BIOS and Install Windows 7/8

    • Restart your computer
    • Before windows 7 starts, Go to boot menu.
    • Select USB drive as Primary Boot option
    • Save changes and Exit.
    • Then Your USB will behave like your windows OS setup disk.
    • Now complete your Windows installation properly. How to install windows 7
    That's all. Hope you find what are you looking for. You can also try these programs: Win To Flash ,UNetBootin etc. I hope this post will help you. If you have any question, comment here.

    How To Optimize Windows 7

    Windows 7: Most popular OS of the world. I don't have to tell you what is Windows 7 or Why people use windows 7? It'll be a waste of your time. Let's talk about the topic. How To Optimize Windows 7- In this blog post I am going to tell you some way to optimize windows 7 for better performance. Sometime computer  go slower for so many software installed and for so many processes running all the time. I will show you the solutions.


    • Restart: Don't keep using your computer continuously. Atleast restart your system once per week
    • Limit the running softwares: When your computer becomes slower go to task manager and end some process
    • Boost your computer's memory with readyboost: Attach a USB Flash drive > then autoplay will appear > Select Speed Up My System .> Select ReadyBoost > Click the Radio button. Click Apply and OK to finish.
    • Uninstall programs that you don't use: It's a great idea to uninstall all those apps that you don't use. For this go to control pannel and find Programs and features or Uninstall. Click there and Select the application to uninstall.
    • Windows 7 Performance Troubleshooter: Go to Control pannel > select troubleshooting > Check performance issue. Follow prompts to optimize performance
    • Disk Defragment: Fragmentation occurs when your computer does not have enough space. It can be fixed by Defragment. Go to Control Pannel > Search Defragment and Select > Choose disk where you need to perform defragment > Click Analyze disk > Finally Click "Defragment Disk".
    • Disk Cleanup: In this process, you can clean unnecessary files. Go to Disk Cleanup at control pannel > Choose drive > Press ok > Make the type of file you need to remove and press ok > Click Delete files.
    Follow this. Your computer will always run very fast. These works are simple and don't take so much time. If you have any suggestion about this, please comment here.  Thank you.

    Sunday, April 6, 2014

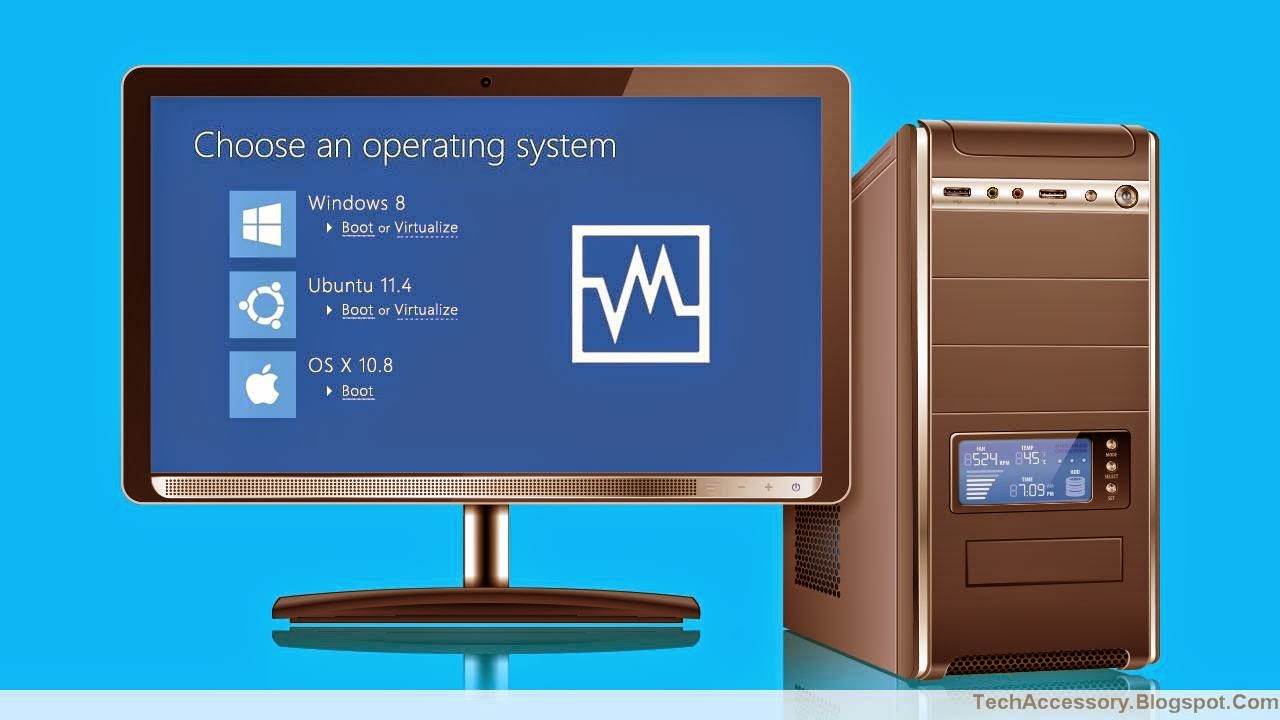
    How To Dual Boot Windows 8 With Windows 7

    Welcome to TechAccessory. Do you know it's possible to use 2 or more OS in a same computer? It can be windows vista with windows 7, windows 7 with Windows 8, Ubuntu with windows 7 or windows 8 etc. What if you can use this? Maybe you have some programs which only work with older versions of the OS. Or maybe you need the taste of some other OSs, but you also don't wanna stop your running windows right now. Here is your solution, install multiple OS by doing multiboot (dual boot). I am telling you the way to do that. Remember Windows 8 with Windows 7 is just an example, You can try other too. Have a look:

    How To Dual Boot Windows 8 With Windows 7


    1. Backup your files: First you need to backup your computer files. It's for your safety. Any problem can occur if you do a single mistake. Backup your private important files and document to skydrive or any removal storage such as SD card, Pen drive, CDs etc.
    2. Make new partition or drive for new OS: Suppose you are installing windows 8 and your have Windows 7 installed. You must need a new partition for your windows 8. So you have to create a new drive for this, new drive's size must be 20GB to 25 GB (For windows 8,8.1). Instructions for making new partition: RIGHT CLICK ON "MY COMPUTER"> SELECT MANAGE> GO TO DISK MANAGEMENT>FIND YOUR BIG DRIVE FROM WHERE YOU CAN MAKE NEW PARTITION>SELECT>RIGHT CLICK AND CHOOSE SHRINK (remember the size will be 20GB-25GB)
    3. Get your windows 8/ 8.1: Now get your window 8 or 8.1. It must be booted for Multi-boot.
    4. Run installer: Restart your computer, then installer will start.  First, choose language and hit install now. Then insert your licence key and click next. Now you have to choose the drive you need to install. Click on DRIVE OPTION (Advanced) then choose un-allocated space (created at step 2). Click new and accept. Then you know how to install windows.
    5. Reboot: As windows setup completes your work it done. Now restart your computer. you will find a screen where windows is asking you to choose the OS. The screen will stay wait 30 second (default). If you don't select anything it will automatically select the new windows (8/8.1). Click options to change the setting. 
    That's all. I hope I can tell you very clearly.Thank you for visiting my blog , Stay tuned for more tips and tricks.